DIY Indoor Herb Garden: Fresh Herbs Year-Round
Create your own indoor herb garden using recycled containers and everyday materials. This project is perfect for apartment dwellers or anyone who wants fresh herbs at their fingertips regardless of the season.
Introduction
There's nothing quite like the taste of fresh herbs in your cooking. Whether it's basil in your pasta, mint in your mojito, or cilantro in your salsa, fresh herbs elevate dishes in a way that dried herbs simply can't match. While buying fresh herbs from the grocery store is an option, growing your own is not only more economical but also more sustainable and incredibly satisfying.
Even if you don't have outdoor space or live in a climate with harsh winters, you can still enjoy the benefits of home-grown herbs with an indoor herb garden. In this tutorial, I'll show you how to create a beautiful, functional indoor herb garden using everyday materials, many of which can be upcycled from items you already have at home.
Benefits of Growing Herbs Indoors
- Fresh herbs year-round: No matter the season or climate, you'll have access to fresh herbs.
- Convenience: Having herbs right in your kitchen means you can snip what you need while cooking.
- Cost-effective: A single herb plant costs about the same as one package of fresh herbs from the grocery store but will produce for months.
- Sustainability: Growing your own herbs reduces packaging waste and transportation emissions.
- Air purification: Like all plants, herbs help filter indoor air and add oxygen to your space.
- Aesthetic appeal: Herb gardens add a touch of living greenery to your home décor.
Materials and Tools
Materials:
- Containers for planting (see options below)
- Potting soil specifically formulated for containers
- Herb plants or seeds (recommended varieties below)
- Small stones or broken pottery pieces for drainage
- Spray paint (optional, for decorating containers)
- Plant markers or labels
- Watering can with fine spout
Tools:
- Drill with bits (if you need to add drainage holes)
- Scissors or garden shears
- Small trowel or large spoon for scooping soil
- Measuring cup for soil
- Painter's tape (if painting containers)
- Permanent marker or paint pen for labels
Container Options
One of the best parts about creating an indoor herb garden is the flexibility in choosing containers. Here are some creative options, many of which can be upcycled from items you might already have:
Mason Jars
Perfect for smaller herbs like thyme or chives. Drill drainage holes or add a layer of activated charcoal at the bottom to help with moisture control.

Tin Cans
Clean out soup or vegetable cans, remove labels, drill drainage holes, and optionally paint for a rustic look.
Wooden Crates or Wine Boxes
Line with plastic (punch holes for drainage), fill with soil, and plant multiple herbs for a mini garden.
Teacups or Coffee Mugs
Ideal for tiny herbs or as starter pots. If there's no drainage, be careful with watering.
Hanging Shoe Organizer
Fabric pocket organizers can be hung on a wall or door and filled with soil for a space-saving vertical garden.
Gutters
Mount sections of rain gutter on a wall with brackets, seal the ends, drill drainage holes, and you have a modern-looking herb planter.
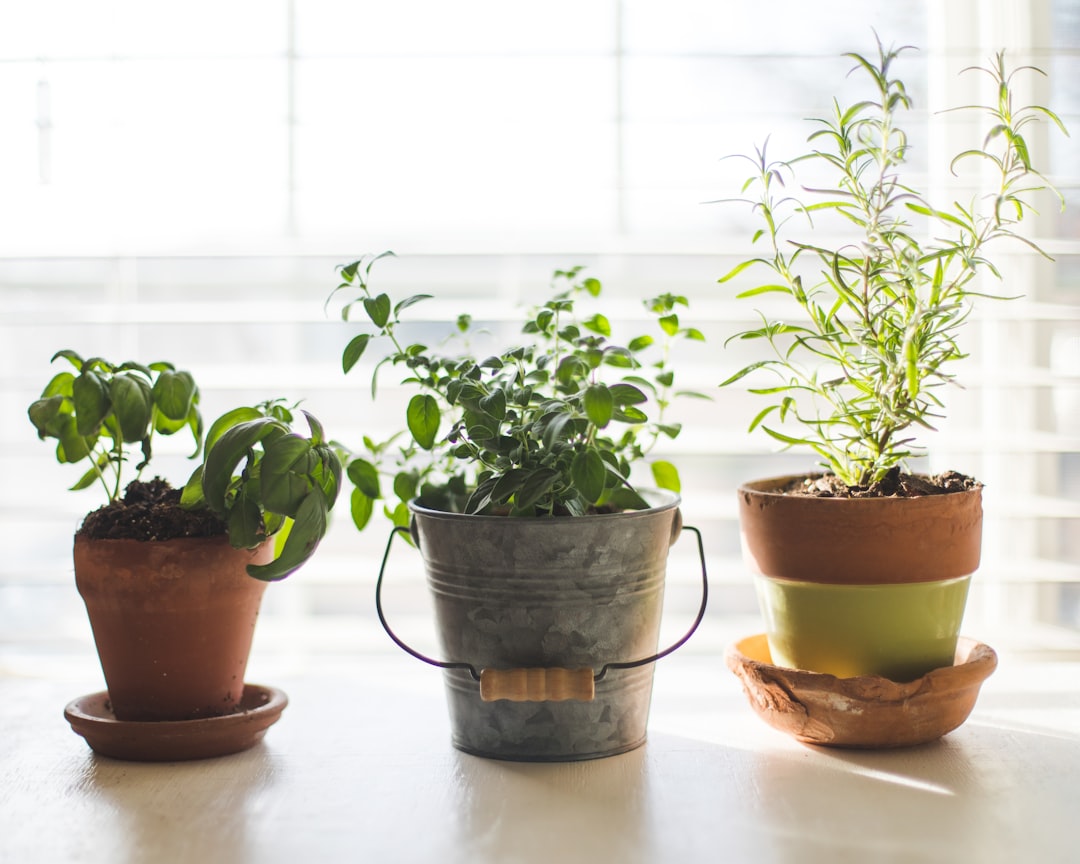
Best Herbs for Indoor Growing
While many herbs can grow indoors, some are easier than others. Here are the top performers for indoor herb gardens:
Basil
Light needs: 6+ hours of sunlight
Water needs: Keep soil consistently moist
Tips: Pinch off flower buds to encourage leaf growth; harvest from the top down
Mint
Light needs: Tolerates partial shade
Water needs: Keep soil consistently moist
Tips: Grows vigorously; best in its own container to prevent overtaking other herbs
Chives
Light needs: 4-6 hours of sunlight
Water needs: Allow soil to dry between waterings
Tips: Cut from the outside in; will regrow quickly after harvesting
Thyme
Light needs: 6+ hours of sunlight
Water needs: Allow soil to dry completely between waterings
Tips: Thrives in drier conditions; ideal for forgetful waterers
Rosemary
Light needs: 6+ hours of bright light
Water needs: Allow soil to dry between waterings
Tips: Don't overwater; prefers drier conditions and good air circulation
Parsley
Light needs: At least 4 hours of sunlight
Water needs: Keep soil consistently moist
Tips: Harvest outer stems first; can tolerate cooler temperatures
Step-by-Step Guide to Creating Your Indoor Herb Garden
Step 1: Choose Your Location
Before gathering materials, identify the best spot for your herb garden. Most herbs need at least 4-6 hours of sunlight daily. A south or west-facing window is ideal. If natural light is limited, consider supplementing with grow lights.
Step 2: Prepare Your Containers
Clean your chosen containers thoroughly. If using recycled containers like tin cans or plastic bottles, drill 3-4 drainage holes in the bottom. For decorative purposes, you can paint or decorate the containers at this stage.
Step 3: Add Drainage Material
Place a layer of small stones, broken pottery pieces, or even bottle caps at the bottom of each container. This helps with drainage and prevents soil from washing out through the drainage holes.
Step 4: Fill With Potting Soil
Add potting soil to each container, leaving about an inch of space at the top. Use potting soil specifically formulated for containers, not garden soil, which can become compacted and hinder root growth.
Step 5: Plant Your Herbs
If using seedlings or small plants:
- Gently remove the plant from its nursery container
- Loosen the roots slightly if they appear compacted
- Create a hole in the soil large enough for the root ball
- Place the plant in the hole, ensuring it's at the same depth as it was in its original container
- Fill in around the roots with additional soil and press down gently
If growing from seeds:
- Follow packet instructions for planting depth (typically 2-3 times the width of the seed)
- Sprinkle seeds over the soil surface or create small furrows
- Cover with the recommended amount of soil
- Mist gently with water

Step 6: Water Thoroughly
After planting, water each container thoroughly until water runs out of the drainage holes. This ensures the soil is evenly moistened and helps the roots establish contact with the soil.
Step 7: Label Your Herbs
Create labels for each herb to avoid confusion, especially when plants are young. You can use:
- Popsicle sticks painted or written on with permanent marker
- Small stones with painted names
- Clothespins clipped to the pot edge
- Decorative plant markers purchased from a garden center
Step 8: Arrange Your Garden
Position your potted herbs in your chosen location, considering both light needs and aesthetic appeal. Group herbs with similar water requirements together for easier maintenance.

Caring for Your Indoor Herb Garden
Watering
The number one cause of herb failure is improper watering. Rather than following a strict schedule, check the soil moisture before watering:
- Insert your finger about an inch into the soil
- If it feels dry, it's time to water
- Water at the base of the plant, avoiding the leaves
- Ensure excess water drains away; don't let plants sit in standing water
Light
Most herbs need 4-6 hours of direct sunlight daily:
- Rotate containers occasionally for even growth
- If leaves become pale or stems grow leggy, the plant needs more light
- Consider supplemental grow lights during winter months
Fertilizing
Herbs generally don't need heavy fertilization:
- Use a balanced, water-soluble fertilizer at half the recommended strength
- Apply every 4-6 weeks during growing season (spring and summer)
- Reduce or eliminate fertilizing in fall and winter
Harvesting
Regular harvesting encourages bushier growth:
- Wait until the plant is established with several sets of true leaves
- Use clean, sharp scissors or garden shears
- Take no more than one-third of the plant at a time
- For most herbs, harvest in the morning when oil content is highest
Pest Management
Indoor herbs can occasionally attract pests:
- Check plants regularly for signs of insects or disease
- For minor infestations, wipe leaves with a damp cloth or spray with insecticidal soap
- Ensure good air circulation to prevent fungal issues
- Isolate affected plants immediately to prevent spread
Creative Display Ideas
Once your herbs are thriving, consider these creative ways to display them:
Tiered Stand
Use a cake stand or tiered plant stand to create vertical interest and maximize window space.
Hanging Window Garden
Install a tension rod across a window and hang small pots with S-hooks for a suspended herb garden.
Repurposed Ladder
An old wooden ladder leaned against a wall creates rustic shelving for herb pots.
Magnetic Wall
Attach magnetic strips to small metal containers and create a magnetic herb garden on a metal surface in your kitchen.
Under-Cabinet Lighting
Install grow lights under kitchen cabinets to create a functional herb garden on your countertop.
Conclusion
Creating an indoor herb garden is a rewarding project that brings the freshness of homegrown herbs into your kitchen year-round. With minimal investment and regular care, your herbs will provide months of flavorful harvests while adding beauty to your living space.
Remember, gardening is about experimentation and learning. Don't be discouraged if some herbs don't thrive at first – try different varieties, locations, or containers until you find what works in your unique environment.
Share your indoor herb garden creations with us in the comments below. We'd love to see your ingenious container ideas and thriving herbs!


Comments (2)
Marcus Reeves
April 15, 2023I tried growing basil indoors last year but it got really leggy and weak. Any tips for keeping it bushy and healthy?
Emily Johnson
April 16, 2023Hi Marcus! Leggy basil usually means it's not getting enough light. Try placing it in your brightest window (south-facing is best) and make sure to pinch off the top sets of leaves regularly. This encourages it to branch out instead of growing tall. Also, rotate the pot every few days so all sides get equal light. Hope that helps!
Leave a Comment